
Quickstart
Setup > Onboarding walks you through getting Etals ready: your brand voice, who you write for, your products and your first automation. You can do it chapter by chapter, in any order.
Brands, markets and sites
These levels matter later. A meta title can be different on every site, and an instruction can apply only to one market.
Setup > Onboarding
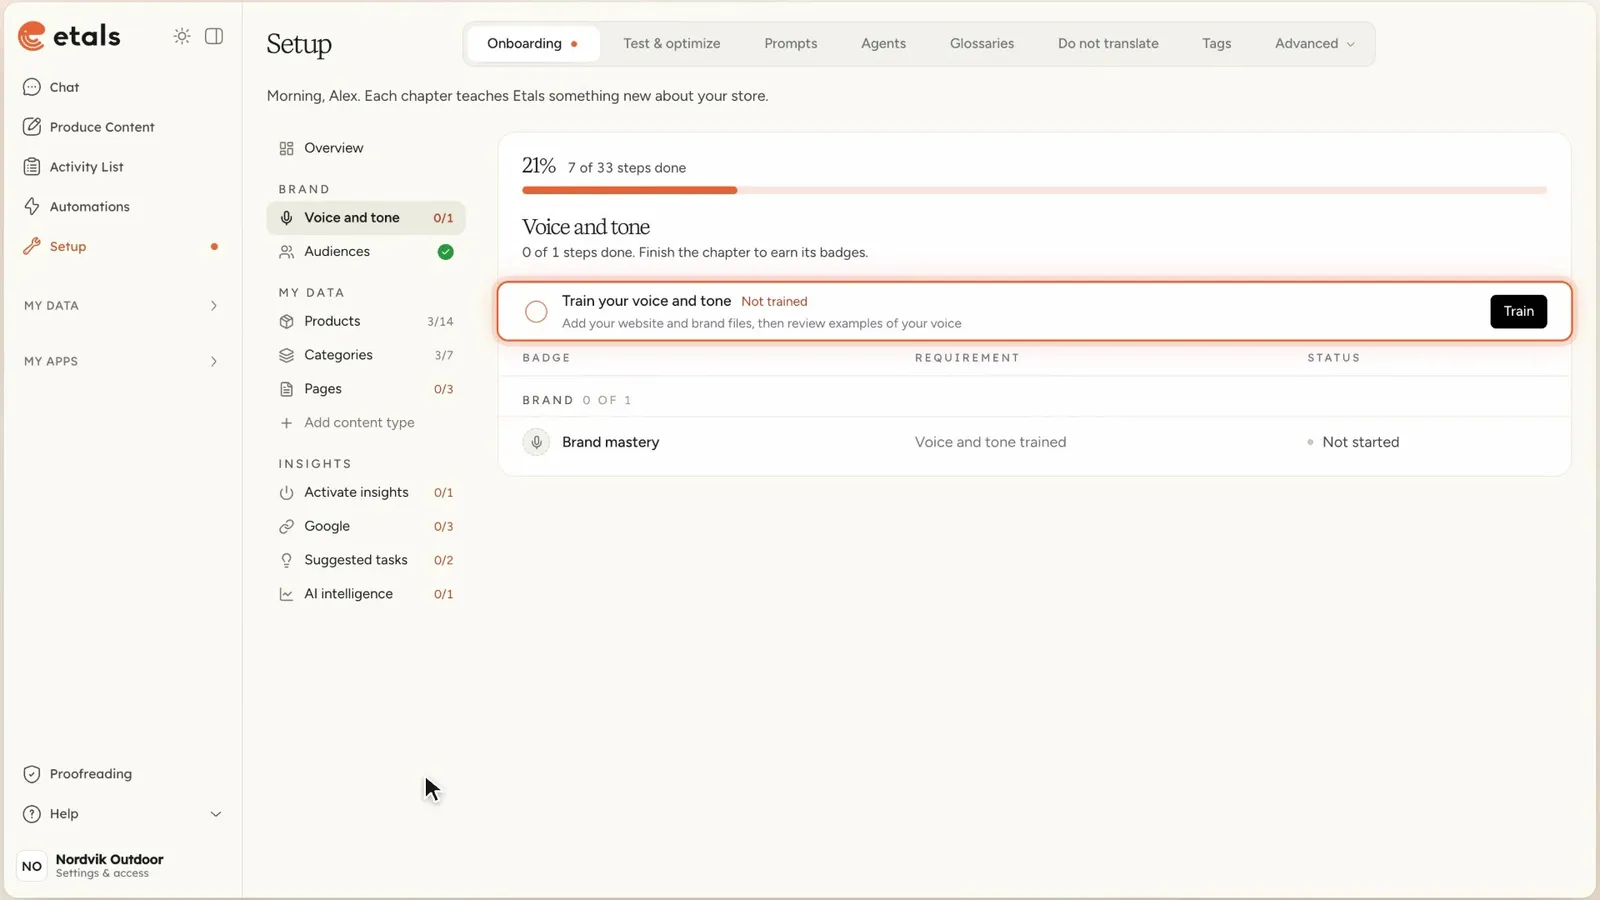
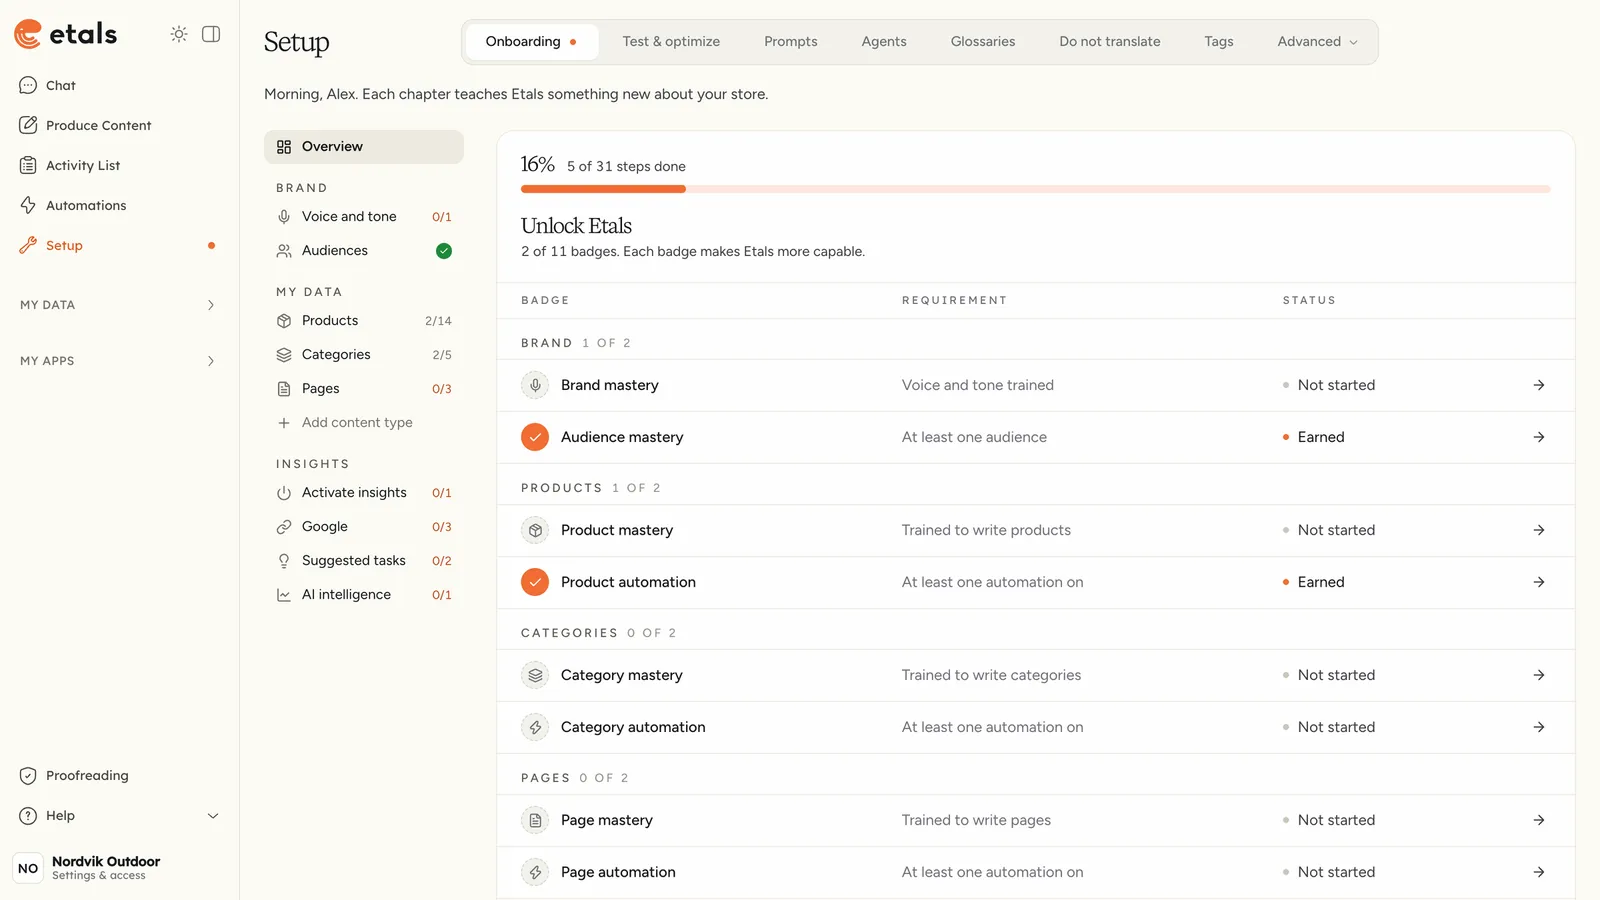
Click Setup in the sidebar. While onboarding isn’t finished, it shows an orange dot, and hovering it tells you how far you’ve come. Setup opens on the Onboarding tab: “Each chapter teaches Etals something new about your store.”
On the left you’ll find Overview and the chapters, in three groups. Overview shows the Unlock Etals table: a badge for each thing Etals has learned, such as Brand mastery or Product automation.
Your first day
You don’t need every chapter on day one. This order gets Etals writing good product content quickly.
Train your voice and tone
Open Voice and tone and click Train. Add your website, upload up to five brand or tone of voice documents, and optionally describe how you write in your own words. Click Start training. Etals writes a set of brand guidelines and shows you examples. Give feedback in the chat next to them, and click Approve voice when they sound like you.
The result is a skill called Brand guidelines in Setup > Prompts. See Skills.
Create one audience
Open Audiences and click Create next to “Create an audience”. Give it a Name, say Who they are and What they care about, then click Create audience. Nordvik starts with Weekend hikers. You can add more detail later in Audiences.
Set up your products
Open the Products chapter and click Choose. Pick the content type that holds your products and click Use, or start a new one under Create a new content type: type a Name and click Create and use.
The setup wizard opens. If you close it, Set up in the chapter opens it again. It has two steps:
- Source: “Where do your products come from?” Choose Import a file (CSV or Excel) or Product feed. This step only appears when the content type has no items yet and isn’t connected to a platform.
- Properties: “Choose what Etals generates and what agents see”. Every property has two switches. Under Etals can generate, Etals switches some on for you and tags them Suggested. For Nordvik it picked Description, Meta title and Meta description out of nine properties. Under Agents can see, turn off properties that would only distract the agents, such as Price SEK. Keep the ones that help them write, like Supplier Notes and Material. Under More context for agents, Images lets agents look at product photos to describe colour and fit.
Click Finish setup. You can change all of this later in My Data > Properties & prompts.
Train one property
Each property you turned on now has its own step, such as “Train Description”. Click Train, say what matters most (or pick from Etals’ hints) and let Etals pick a few test products. Click Start training, read the results, tell Etals in the chat what to change, and click Approve and finish when it reads right.
What you teach here is saved as that property’s instructions. See My data.
Training needs access to Test & Optimize, and approving needs deploy rights there. If Etals says “You need access to Test & Optimize to train Etals”, or the approve button is greyed out, ask an admin for that access. Turning on an automation needs permission to manage automations, and activating insights needs access to the general settings.