
Audiences & tags
Audiences and tags are set up once and picked where you work: for a whole grid, for one column of a grid, or for a canvas. Every value Etals writes there uses what you picked.
- An audience tells agents who you’re writing for. Use one when a piece of work is meant for a specific group of buyers.
- A tag switches on the prompt sections you’ve made depend on it. Tags are for advanced users who want full control of their prompt engineering.
Audiences
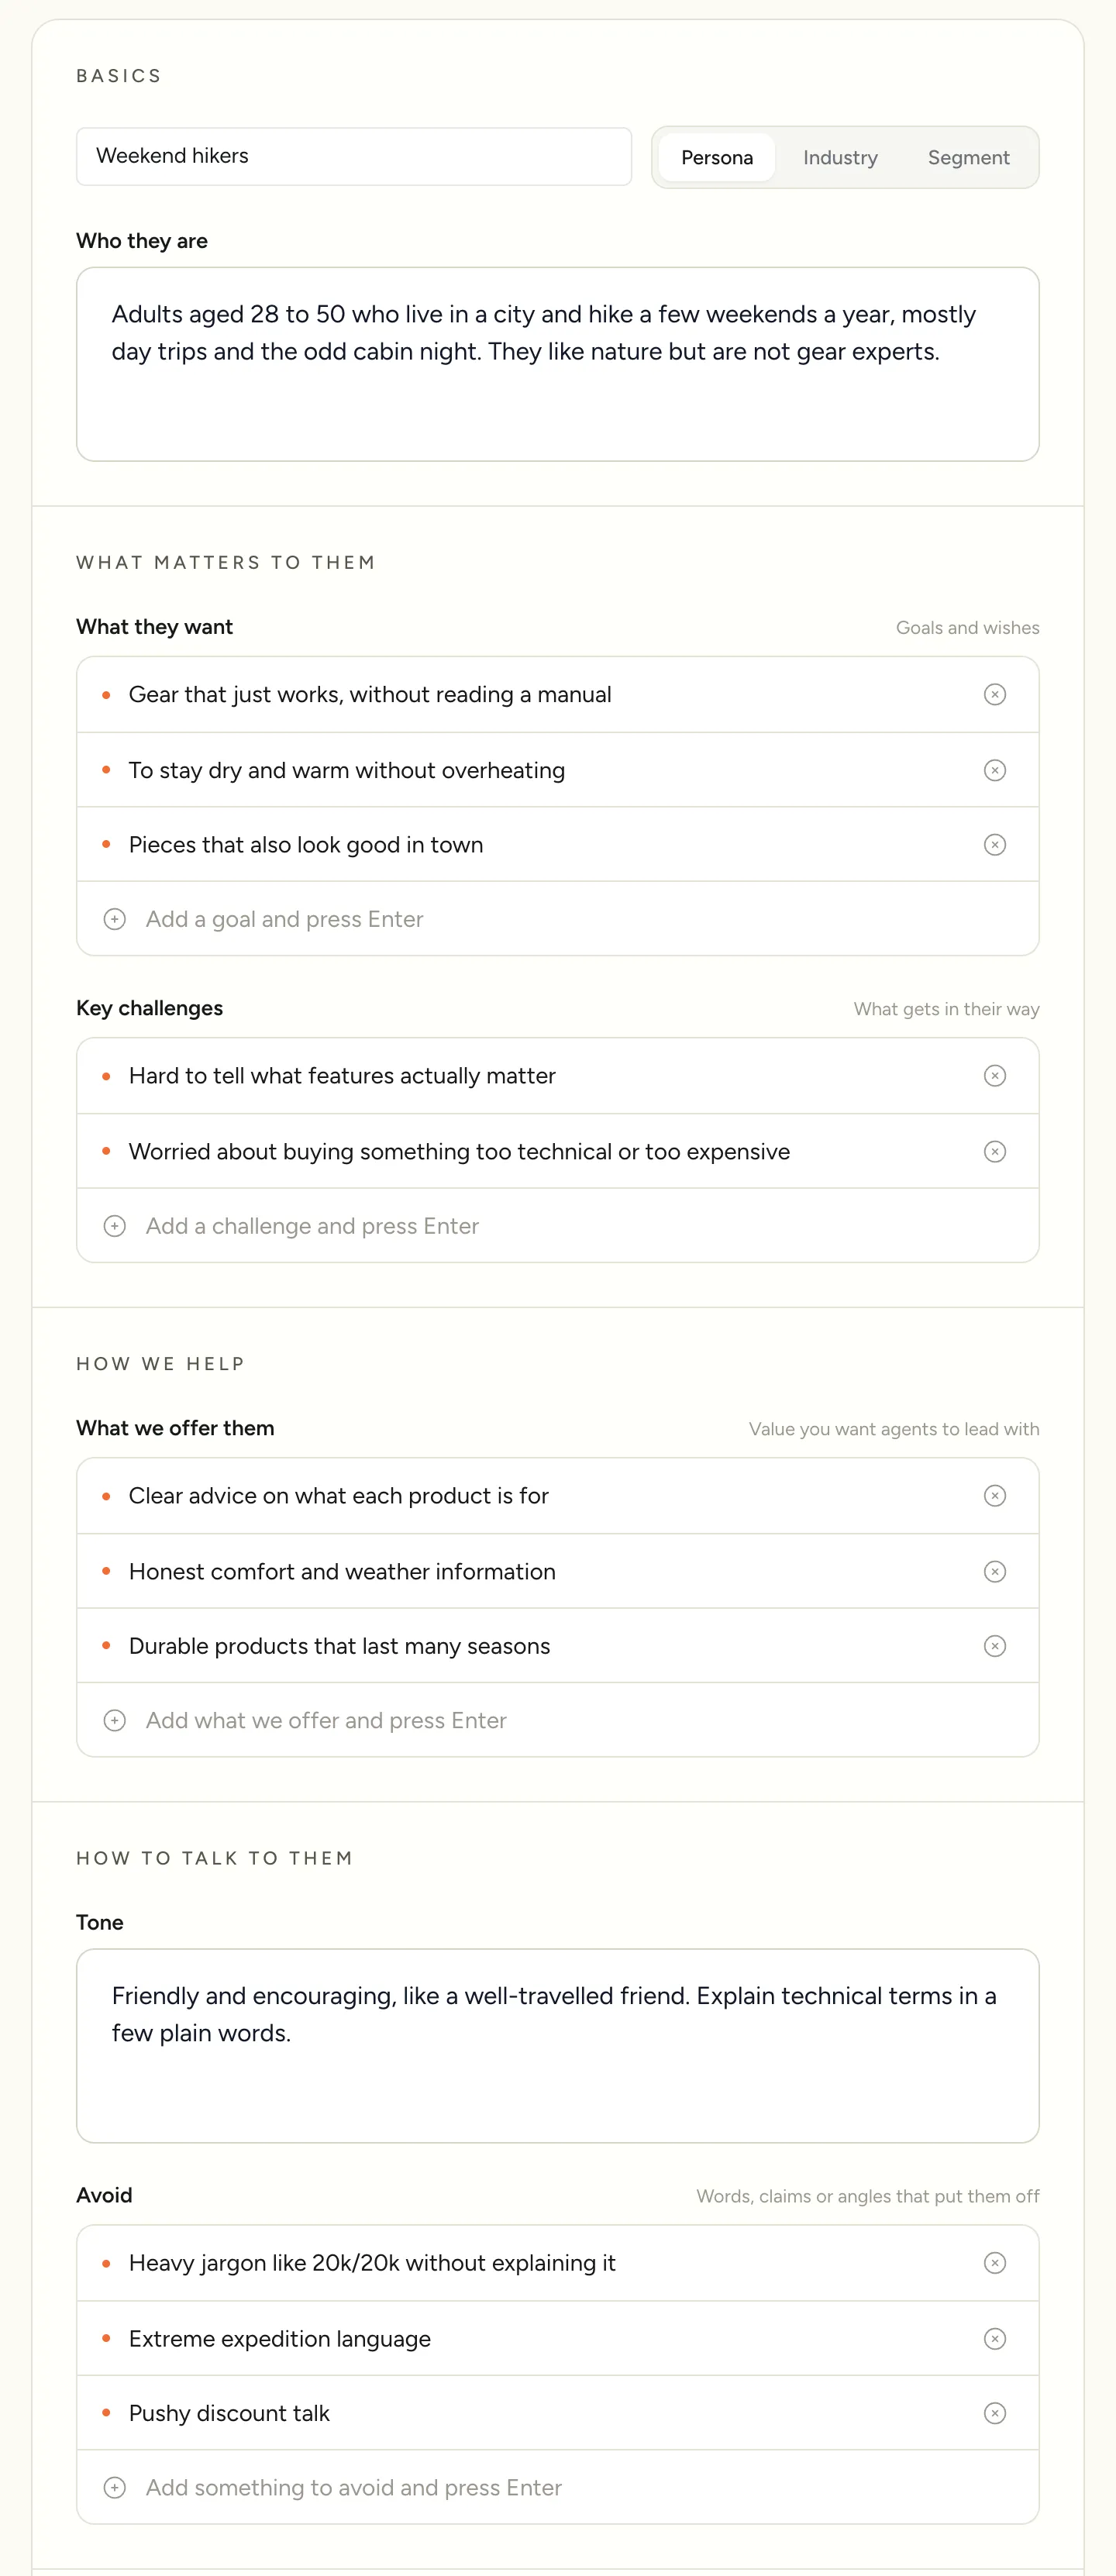
An audience describes a group of customers: who they are, what they want and how to talk to them. You fill in a short form, and Etals turns it into a prompt your agents read.
The same Granite Trail Boot needs a different pitch depending on who’s reading. Nordvik Outdoor might have three audiences:
- Weekend hikers: city people who head out on Saturdays. They want comfort and something that looks good in town too.
- Trail runners: they count grams and care about grip and drainage. Skip the lifestyle talk.
- Families on a budget: one jacket has to last two kids. Durability and price per year of use matter more than features.
Audiences live in Setup > Prompts on the Audiences tab. Each card shows the audience’s name and a short description.
Create an audience
Click New audience, either the button at the top or the card in the grid. The editor opens with the lead line “Fill in what you know. We turn it into a prompt your agents read.”
You don’t have to fill in every field. A name, Who they are and a few lines under What matters to them already make a difference. Click Save when you’re done.
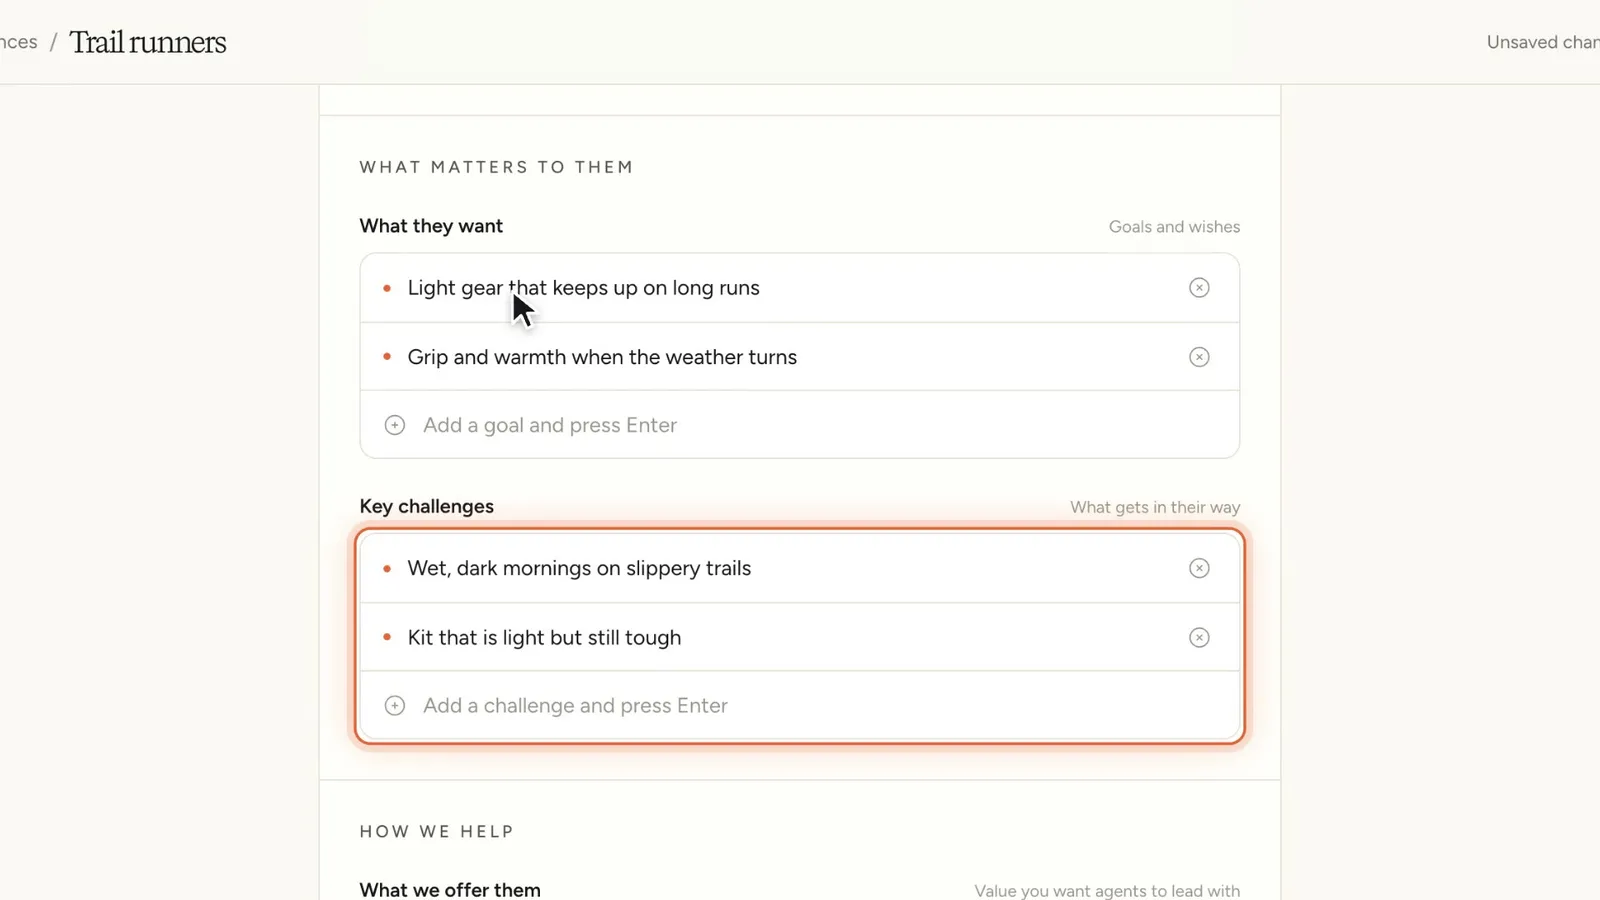
At the bottom, open Prompt agents read. It shows the text Etals generated from the form, which is what an agent gets. Empty fields are left out.
Start from a persona document
If you already have personas in a document, you don’t need to type them again. Drop the file anywhere on the Audiences tab (“Drop to create an audience”), or open the editor and click Browse files next to “Already have a persona doc?”. PDF, Word (DOC, DOCX), PowerPoint (PPTX), TXT and Markdown files work.
Etals reads the document and fills in the form. A banner says which file it came from, with Undo if you’d rather start over. Nothing is saved until you check the fields and click Save.
The Audiences chapter in Setup > Onboarding has a shorter form too. Click Create next to “Create an audience”, fill in Name, Who they are and What they care about, and click Create audience. You can add the rest of the detail later on the Audiences tab.
Pick audiences for a grid
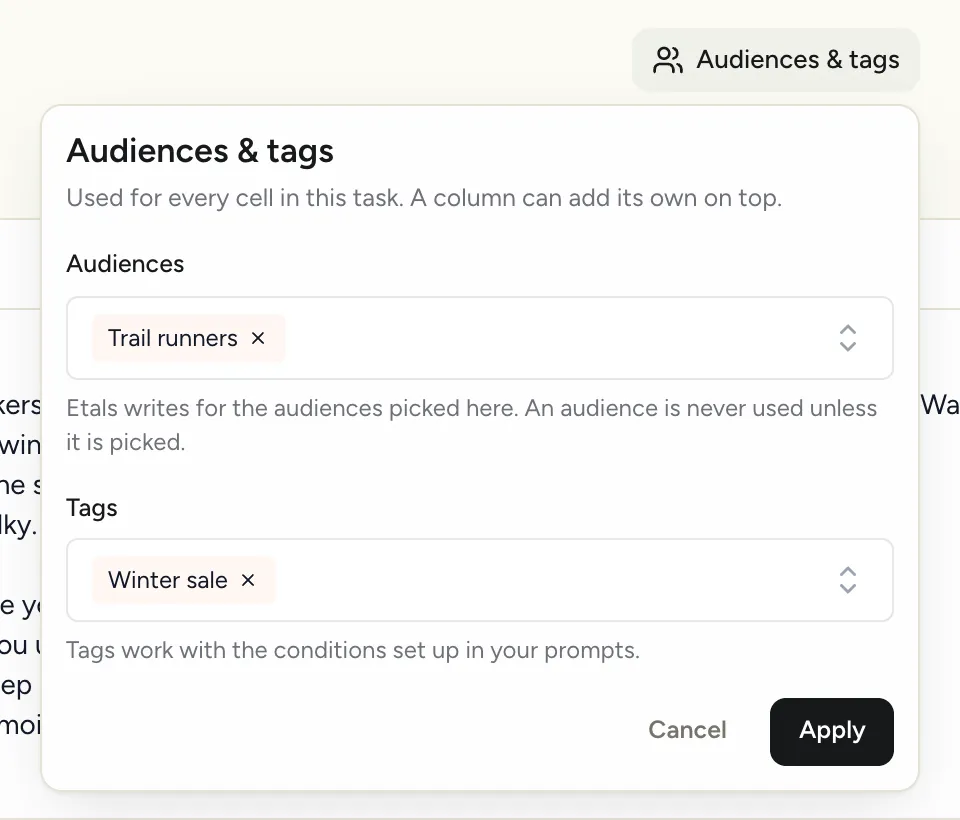
An audience is only used when you pick it. Nothing is added to your work on its own.
What you pick here is “Used for every cell in this task.”
Add audiences to one column
Some fields need a different angle. Right-click a column header, or click it, and choose Audiences & tags…. The audiences you pick here are added on top of the grid’s own, for that column only, and the column header shows them as a small pill.
A Nordvik grid written for Trail runners can, for example, add Families on a budget to the Meta title column only.

Pick audiences for a canvas
When you start a new canvas, the card “What is this canvas about?” has an Audiences field: “Every piece on this canvas is written for them.” To change them later, open the canvas’s … menu and choose Update project settings.
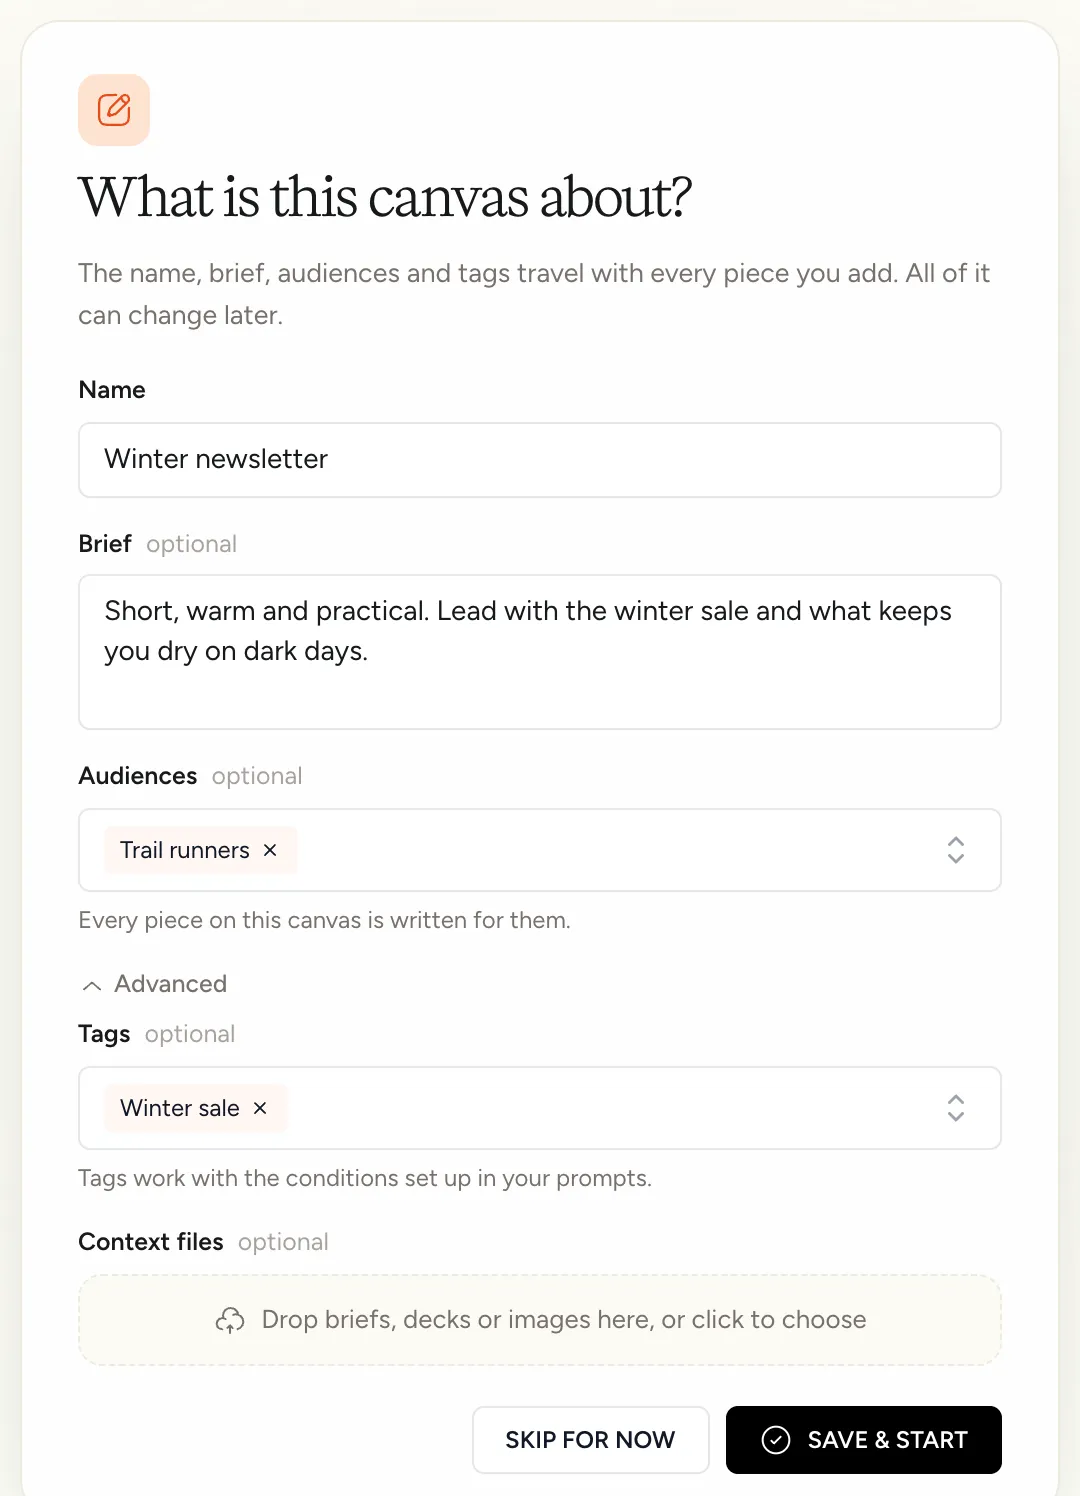
How audiences are applied
Every time a value is generated, the agent reads its own prompts first and then the prompt of each picked audience, in the order you picked them. On a grid, the grid’s audiences and the column’s audiences are combined, and each audience is read once. On a canvas, every piece uses the canvas’s audiences.
Picking doesn’t change values that are already written. Generate them again to use your new picks.
Tags
Tags are for advanced users who want full control of their prompt engineering. If you only want to write for a group of people, pick an audience instead.
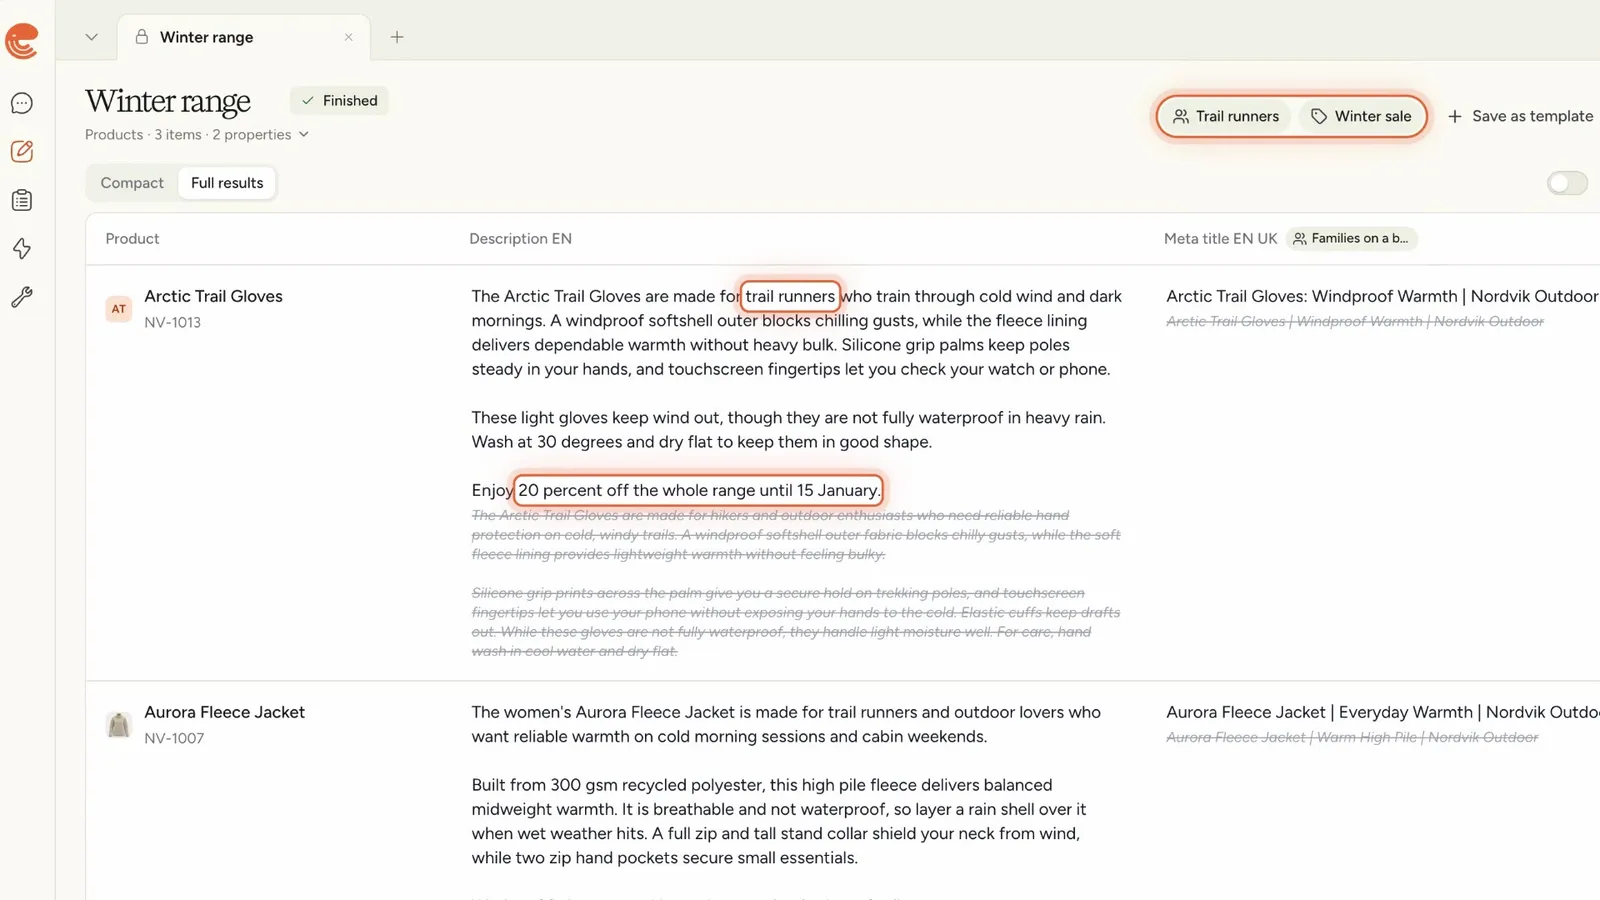
A tag is a label you put on a grid, a column or a canvas. On its own it does nothing. It becomes useful when a section of a prompt says “only use this when the tag is Winter sale”: that section is then switched on for exactly the work that carries the tag, and left out everywhere else.
That’s how Nordvik runs a winter sale. The Winter campaign skill gets a section that only applies with the Winter sale tag. A grid that should mention the sale gets the tag, and every other grid stays as it was.
1. Create the tag
Go to Setup > Tags: “Labels that group work across tasks, records and projects.” Click New tag, fill in Tag Name and click Create Tag. Slug, Color and Description are optional.
2. Make a prompt section depend on the tag
In Setup > Prompts, open a skill, or a field’s instructions on the My Data tab. The editor opens in Simple mode.
Add a section
Click + Add a section, or use an existing one, and give it a title, for example “Winter sale”.
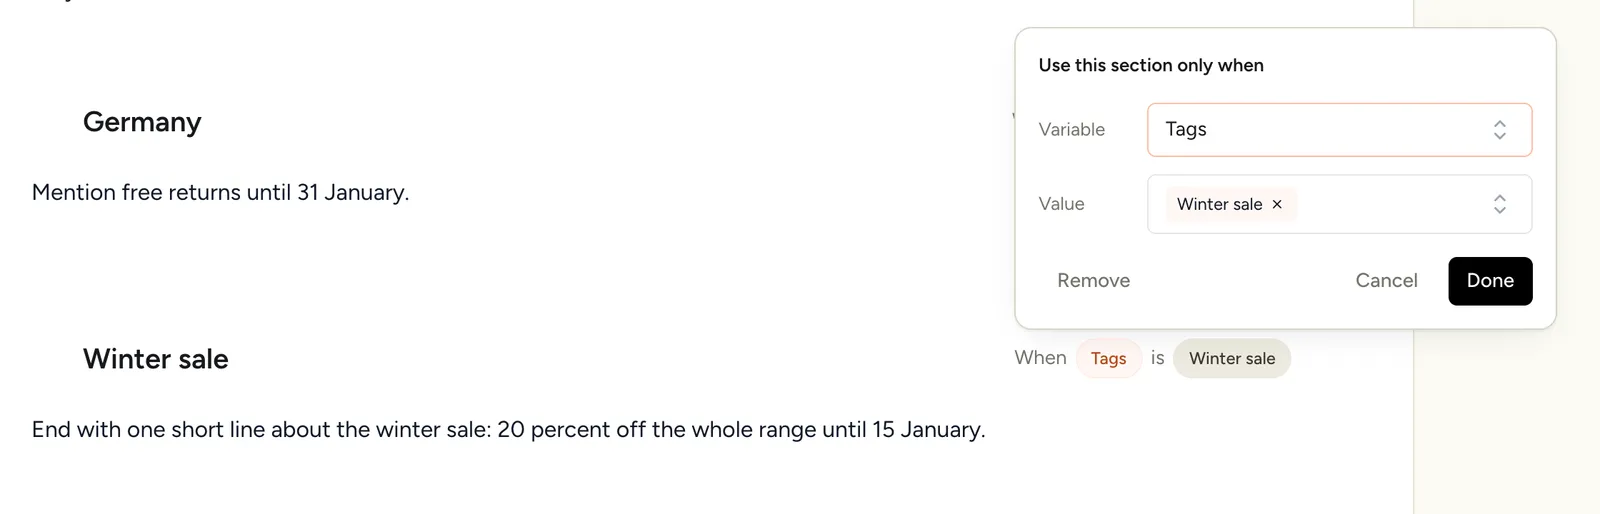
3. Combine conditions in Advanced
Switch the editor to Advanced when one condition isn’t enough. There, each instruction can carry condition groups:
- Conditions inside one group are joined with OR: “Tags is Winter sale OR Tags is Black week”.
- Groups are joined with AND: the instruction applies only when every group matches, for example a tag group AND “Market is Germany”.
For tags, is matches when one of the picked tags has that name, is not leaves the instruction out when that tag is picked, and contains matches part of a tag name.
The Variables panel in Advanced also has Tags. It puts the names of the picked tags into the text, separated by commas. That’s useful when an instruction should name the campaign it’s part of, such as “This text is part of: {{tags}}”.
4. Pick the tag where you work
Tags are picked in the same places as audiences:
- A grid: Audiences & tags > Tags, for every cell.
- One column: the column’s Audiences & tags…, on top of the grid’s tags.
- A canvas: open Advanced on the setup card, or in Update project settings, and pick under Tags. A piece on the canvas can also have tags of its own, which are added to the canvas’s.
How tags are applied
Every time a value is generated, Etals checks each section’s conditions against the tags picked for that value: the grid’s and the column’s together, or the canvas’s and the piece’s together. Sections whose conditions match go into the prompt. The others are left out.
Three things decide whether a tag section gets read:
- Skills only reach the agents that use them. A tag section in a skill is read only by agents that have the skill. Check under Setup > Agents > Knowledge. Etals doesn’t always attach a seasonal or campaign skill to an agent on its own, so attach it yourself when you rely on it.
- Field instructions reach every agent. A tag section in a field’s instructions on the My Data tab is read by every agent that writes that field.
- Tag sections should agree with your other rules. When a tag section asks for something your brand guidelines rule out, agents follow the guidelines. “End with one short line about the sale” works alongside “Lead with what the product helps you do”. “Lead with the sale” fights it.
Here is the result for the Arctic Trail Gloves: written for trail runners, and ending with the winter sale line.
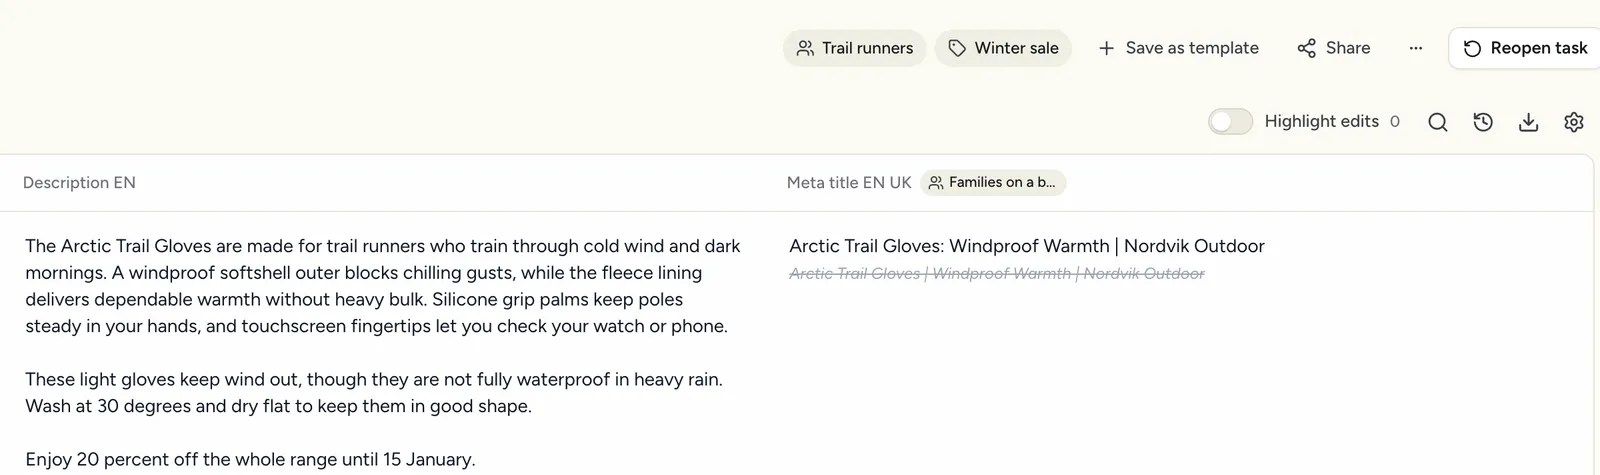
Good to know
- Templates: Save as template keeps the grid’s tags, so new grids from that template start with them. Audiences aren’t saved in templates, so pick them on each new grid.
- Finished grids: the pills stay visible, but the picks can only change while the grid is open. Reopen the task to change them.
- Audiences on agents: the Audiences row under Setup > Agents > Knowledge doesn’t add an audience to your work. From there, only an audience’s sections that carry a condition, such as a tag, apply. To write for an audience, pick it on the grid, the column or the canvas.